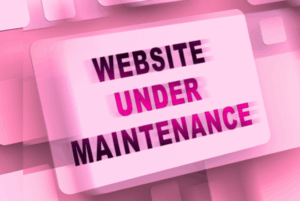
In today’s digital economy, a business website is more than an online brochure, it’s a living, breathing extension of your brand, operations, and reputation. Yet, one of the most common mistakes companies make is treating their website as a once-off project. After launch, they move on, and that’s where problems begin.
Just like your business systems or infrastructure, your website requires ongoing maintenance to remain secure, fast, and compatible with evolving technologies. Neglecting it can quietly lead to performance issues, security breaches, or even complete downtime.
At Okuhle Digital, we’ve seen it all, from sites running outdated plugins that suddenly stop loading, to broken contact forms costing businesses leads, to sites blacklisted for security vulnerabilities that could have been prevented with timely updates.
Below, we unpack why website maintenance matters, how often it should be done, and what signs indicate your site might be overdue for professional attention.
1. Websites Are Built on Constantly Evolving Technologies
Every website, whether built on WordPress, Joomla, or a custom framework, relies on layers of technologies:
- The server environment (PHP, MySQL, cPanel or WHM)
- The content management system (CMS) itself
- Installed themes and plugins
- Front-end libraries (JavaScript, CSS frameworks, etc.)
Each of these components is updated regularly by their developers to enhance functionality, patch security flaws, or align with newer standards.
When you fail to update them in sync, your site risks becoming incompatible with its own hosting environment, a leading cause of “white screens”, PHP errors, or broken page layouts.
2. Security Vulnerabilities Multiply with Age
Outdated plugins and themes are among the top entry points for cyber-attacks. Hackers scan the web daily for known vulnerabilities in older versions of popular plugins, using automated scripts to exploit them.
Regular maintenance, including updates, malware scans, and backup checks, protects your site from:
- Malicious code injections
- Spam link farming
- Defacements
- Data breaches
If your business handles any form of customer data, regular maintenance isn’t optional, it’s a compliance responsibility under POPIA and similar data-protection laws.
3. Performance and SEO Depend on Maintenance
Website speed and technical stability are critical SEO ranking factors. A neglected website tends to:
- Load slowly due to outdated code or bloated scripts
- Contain broken links or missing images
- Display inconsistently across browsers and mobile devices
Search engines interpret these issues as poor user experience and can gradually push your site down in rankings.
Routine maintenance ensures your website continues to perform optimally, improving both search visibility and conversion rates.
4. Broken Pages Signal a Website in Need of Attention
If you’ve recently noticed broken images, missing sections, or strange formatting on certain pages, that’s your website telling you something’s wrong.
We recommend taking 5–10 minutes every month to:
- Open your homepage, service pages, and contact form
- Test your links and submission forms
- Check for broken pages or outdated content
If anything looks off, a page not loading, slow response times, or missing visuals, it’s time for a maintenance intervention.
These visible “surface” issues often point to deeper technical problems underneath, for example, conflicts between outdated plugins or a PHP version that’s no longer supported.
5. PHP and Server Upgrades Affect Your Website More Than You Think
Many website owners don’t realise that their hosting server evolves independently from their website. Hosting companies, including us at Okuhle Digital, periodically upgrade PHP versions to improve performance and security.
If your website’s theme or plugins aren’t compatible with the latest PHP version, parts of your site can stop working. You may see warnings like “Deprecated function” or “Critical error on your website”.
Scheduled maintenance ensures that your site remains fully compatible with these upgrades and continues to run smoothly.
6. How Often Should a Website Be Maintained?
The frequency depends on the size and complexity of your website, but as a general guide:
| Frequency | Task | Description |
|---|---|---|
| Monthly | Security updates & backups | Update all themes, plugins, and WordPress core; perform security scans and off-site backups. |
| Quarterly | Compatibility checks | Test for conflicts, verify PHP version, and ensure SSL certificates are valid. |
| Bi-annually | Performance review | Optimise database, compress media, and check site speed across devices. |
| Annually | Full audit | Review site design, SEO structure, analytics tracking, and content accuracy. |
At Okuhle Digital, our Website Maintenance Packages are structured around this schedule to ensure uninterrupted uptime and long-term stability.
7. The Business Case for Ongoing Website Maintenance
A well-maintained website protects your brand image, customer trust, and revenue. Businesses that invest in routine maintenance benefit from:
- Higher uptime and reliability
- Improved site speed and UX
- Reduced risk of security incidents
- Lower long-term costs (prevention is cheaper than emergency repairs)
- Better SEO and lead generation performance
Think of maintenance as digital insurance, it’s far less costly to stay proactive than to rebuild after a crash.
8. How to Know When It’s Time for Professional Help
You may need a maintenance review if:
- Your site takes longer than 3 seconds to load
- You notice “critical error” messages
- Pages look different on mobile vs desktop
- Your contact form or checkout stops working
- You haven’t logged into your CMS dashboard in over 3 months
If any of the above sound familiar, it’s time to have a professional audit your site.
Final Thoughts
Your website is not a “set-and-forget” investment, it’s a living asset that grows, adapts, and occasionally needs a tune-up.
By adopting a proactive maintenance routine, you’re not just avoiding technical issues, you’re strengthening your brand’s foundation in a fast-changing digital world.
If you’d like a complimentary Website Health Check, contact Okuhle Digital today. We’ll review your site’s performance, identify potential risks, and recommend a tailored maintenance plan to keep your website running at its best.